Sending your first message
Send a custom test message over the Astrocast satellite network that will display in the Astrocast Portal.
Check next satellite pass
Check the next Astrocast satellite pass at your location in the Astrocast Portal.
Hardware Setup
Instructions
15 minutes before a satellite pass, install your setup outside with a clear view to the sky, free from trees, buildings, flying cars and elephants, etc.
Connection
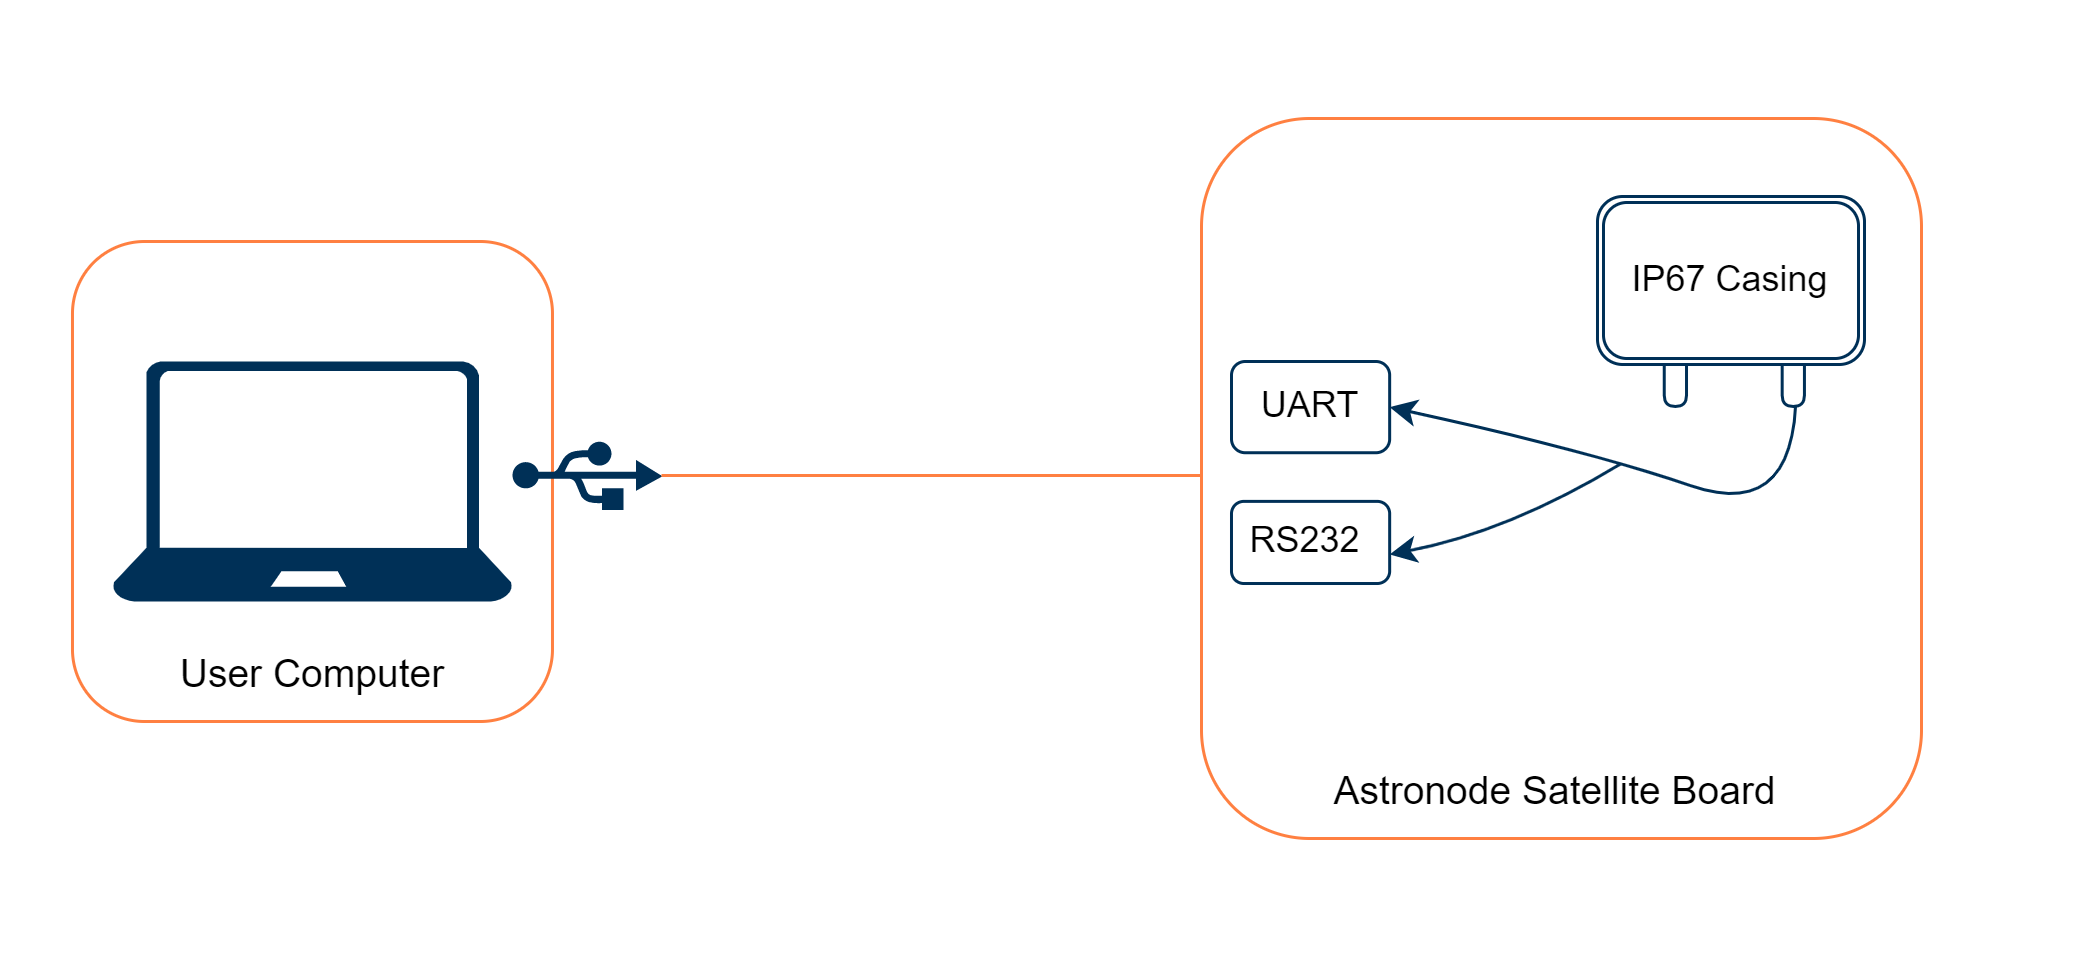
Connect the Astronode Satellite Board to your computer with either the UART Cable 1.8m or the RS232 Cable 5m, see Interfaces.
Example
The setup below uses the default casing with the Astronode Satellite Board inside and the UART interface to connect the computer.

- Make sure to put some distance between your computer and the DevKit, as this could lead to interferences.
- Using another type of housing than the one provided with the DevKit might impact the performance of the RF communication.
Use the Astronode GUI
The Astronode Graphical User Interface (GUI) is a Windows application helping you configure the Astronode DevKit. The GUI also allows you to send data and monitor events such as acknowledgement reception on the Astronode S. It is compatible with Wi-Fi and Satellite board.
Download & Installation
See Tools & Libraries section for the GUI installer.
- Requires Microsoft Windows 10 or above.
- Requires .NET 5.0 Runtime
- If the DevKit is not recognized properly when you plug it, you might need to install a FTDI driver.
Configuration
Launch the Astronode GUI application on your computer.
Select COM Port
Connecting the Astronode DevKit to your computer through a TTL cable should mount a COM Port on your computer. You need to select the right port.
Here is the process on Microsoft Windows 10:
- Open
Device Manager. - Click on
Viewin the menu bar and selectShow hidden devices. - Locate
Ports (COM & LPT)in the list. - Check for the COM ports by expanding the list.
Set geolocation (optional)
- Enter the
Latitude. - Enter the
Longitude. - Set Add to messages to
ON. - Click on
Set geolocation config.
Setup Wi-Fi network (only for Wi-Fi board)
Only 2.4 GHz Wi-Fi access points are supported.
- Enter the
SSIDof your Wi-Fi network. - Enter the
Passwordfor your Wi-Fi network. - Enter the
Astrocast Tokenwith Wi-Fi DevKit role (Learn how to Create an access token). - Click on
Set Wi-Fi config.
Enqueue a message
- Enter your message into
Enter your messagetextbox. A message can be up to 160 bytes. - Click on
📨 Queue message.
For a first trial, we recommand you to keep your payload short (like 10-30 bytes).
Get an ACK from the satellite
If the transmission is succesful, your DevKit will get an acknowledgement (ACK) from the satellite.
You will see the "Acked" circle on the Astronode GUI turn to green. 🟢
Screenshot

Delete the oldest message in the queue
Click on Wipe last message in buffer.
Retrieve your message in the Astrocast Portal
- Wait up to 24 hours* (current maximum latency).
- Go to the Astrocast Portal.
- Click on
Messagesin the sidebar. - See your message in the list.